Showing posts with label Daydream. Show all posts

Sunday, September 06, 2015

The Plate Wall


Sometimes the plate wall changes on a whim.
As a matter of fact the shelf above the wash stand does too. 


This plate hanger is my own wire creation because 
I'm still playing with wire.
I have a Pinterest board for Wire Creations that I confess inspires me.


Today I added the large fruit and melon platter.

There is not much planning, I'm just kinda haphazardly adding them. 


Here you can see the latest version of the shelf.
Just in case you are wondering, the blue glass vase holds the dried stalks from this years daylily crop. 


I've done a little staging on top of the jelly cabinet.


Until now I used the top as a holding place for stuff. 
I like this much better.
Now it is a holding place for arranged stuff.


Thursday, September 03, 2015

A Set of Three

The Chair

I found this antique office chair at a local thrift store. 
My good luck!
Even though it was a "project", it was exactly what I wanted for the attic studio. 


I replaced broken dowels and glued it all back together.


I also had to replace the worn casters and found exact replacements at House of Antique Hardware.


The Desk

I planned for a long time to use the extra antique table top to make two art desk. 
One for the Attic Studio and one for the Rose Garden Parlor. 


This one is for the Rose Garden Parlor and I cut eight inches off the backside so it would fit the parlor.
Way back when, I found antique table legs for the front and I used ripped 2 x 4's for the back legs.


Here you can see I painted, distressed and waxed the chair.
I also made a thin pad for the chair. 
It's all ready for art making.


The next day, I went over to sit.
It felt like the sit and stare stage that I enjoy after finishing a painting. 
I needed to go sit and stare at my new art desk and chair.
I love the chair so much in the parlor that I'm on the lookout for another for the Attic Studio.

The Footstool

The next day I took the little foot stool over. 
I painted the legs, that yellow and replaced the nasty fabric on the sides with the beautiful floral linen.
I didn't replace the naugahyde vinyl on the top. 
I thought it looked gently used and fit right in.

A Set of Three 


Desk and Chair and Footstool
three projects

I am so ecstatic about reaching this point in my daydream.
I will be hanging the One Hundred Faces over the desk just as soon as I put a hanger on it.
I'm also making a shelf with the eight inch piece of the table that I cut off. 
Yes, I will show. 


Today at the Rose Garden Parlor desk
The Zen of Seeing

...I started reading this.
The Zen of Seeing by Frederick Franck.
It is about drawing and sketching and I plan to go over each morning to read and perhaps do a little sketching. 
If you know me and my art practice, you will probably know that I don't particularly enjoy the sketching stage. 
I know. I know. 
But I think in the past when I felt pressed for time, I just skipped that step whenever I could.
And that became my practice.

I do know it is important and my mission now is to enjoy and be inspired by this book to start a new art practice.
You know I will be sharing.

Saturday, September 27, 2014

Sixty-Six Morning Glories

Floor Cloth Update
Morning Glory Floor Cloth

Finally!
Finished!
I confess I got pretty tired of painting morning glories before I got to the magic number of 66.
Yep. The cloth is 57.5 inches wide, 122 inches long, 66 morning glories and 73 leaves.
I sketched them with charcoal five at a time.
It took me just over a month to paint.
I had to push myself many times because my little secret...
...I get bored with repetition.

The thing that kept me going was my daily visit to the morning glory trellis in the garden. 
Each morning I took new shots of the beautiful display for more floral reference in the studio. 


Before starting with the design, the front and back sides of this heavy duty canvas were primed with two coats of house piant. 
After painting 66 morning glories the back side was painted with one coat of the gray (floor paint), and three coats of high traffic formula polyurethane floor finish. 
The front received four coats of the floor finish. 
I moved the cloth off the studio table and onto the studio floor when it was time to use the poly floor finish. 


Not until I was totally finished did it occur to me what a folly the whole project was.
As you know, this is going to the Garden Palace.
A place where few others may ever see.

And that my friends is when I realized,
I did it for myself.
Even though I had to push at times, It please me very much and that is all that matter. 

The Four Corners


Now it is time to get back over to the Garden Palace and paint the floor. 
Having this finished, as well as, the cooler weather is a real incentive to get back over there.
♥ 

Friday, December 13, 2013

There is something I haven't been real clear about.
I abandoned my daydream.
I didn't finish.
The work isn't done.
And
I neglected my daydream.

I can't show you the finished inside because as close as I got, I didn't quiet finish before one of those life challenges totally sidetracked me.

During  all of this sharing and reminiscing, I have been trying to remember why my daydream came to a screeching halt. And when.

It has been years. Yes. I knew that. The sad thing is the reason I could not remember is because it has been so long.  That and my total disgust, sadness, grief and shame for letting it go to such decline.

It really is not as bad as my telling sounds. Any old house will need repainting. When I painted it, I remember that I hoped it would last until I was 60. Sure enough, about ten years ago, the paint was peeling. But I had abandoned my daydream.

I saved restoring the floors for last. Also, installing the attic floor was a long range goal. Restoring the parlor floor was the last undertaking before abandonment.

Finishing the floors is not such a big job.
Except.
While I was shamefully neglecting my daydream, seasonal (winter) guest moved in upstairs.  You might even call them squatters, of the furry type.  They found the accommodations to their liking but oh my they are a messy bunch. So there is that!

I have been studying all of the photographs for clues about why, when and how this neglect happened. One of the chair photos below has a date, April 2001.


With that date, I knew the why, when and how. It is not part of this story except it is the cause of the beginning of abandoning my daydream. 

chippy farmhouse jelly cabinet
 I made a pact with myself that I would not buy any furnishings for The Garden Palace until everything was done.
Yes, that deal lasted maybe a couple of months. 
This little jelly cabinet was my first purchase.
one of two tables that I purchased
someone told me this was a library table
 I used this table for a work table until I decided to move the base to the big house and add a glass top on it. 
After all, I had two tables. 
set of four homemade chairs
This is the picture that had April 2001 on the back. I'm getting it ready to paint.
Notice the parlor floor.
mustard yellow homemade chairs
 I brought these to my studio and made cute little skirted seat covers. I purchased these along with the jelly cabinet. 
They still live in my studio.
Here, I can see the parlor floor has been finished.
My last accomplishment.
chippy red metal cabinet
and my ten foot ladder
to be continued....

Thursday, December 12, 2013


In all its splendor.....
 This is my very most favorite picture of The Garden Palace. 
It goes without saying why.
Doesn't it make you want to go inside. 
 I don't know why but these are the only pictures I have showing 
The Garden Palace
in all its splendor.
Have I told you The Garden Palace is all of 18 by 22 feet?
396 square feet.
I could live in it.
One thing I could count on dear husband to do for me was use his pickup to haul equipment and material that was more than I could handle.

When it came time for me to paint the outside, he hooked up to his trailer and we went to the big city to rent scaffolding with humongous wheels so I could just roll it around.

I so wish I had a picture of me on the scaffolding scrapping the first and only coat of paint my little daydream ever had. 
I used bleach on the grayed wood, before applying one coat of Kiltz and two coats of paint. I remember I had the scaffolding for the month of September and I think I renewed the rental for October. 

The peek of the gable is at least 26 feet off the ground and my scaffolding didn't quiet put me high enough.

I have a vivid memory of taping my brush to a broom handle and turning a five gallon bucket upside down to stand on to reach the peak. 

 The above and below picture is of the same front corner taken at different times and most likely different years.
 As you can see, I did run a water line, but not to the inside. We dropped a pvc line across the tank and ran it to this corner. 
It is not functional at the moment. 
And I've just added that to my 2014 list.  
 The other front corner.
Monarda genus
aka horsemint, bee balm, bergamot
It grows wild on my place. 
It is thought to be a weed by some. 
Not me. 
Any Garden Palace should have bee balm.
When you come for the tea party, we will have

Bee Balm Tea
1 tablespoon of the fresh edible bee balm flower.
(leaves can be used too)
1 cup of water
honey or sugar to taste

Place bee balm in a tea ball and then in the prettiest tea cup you have.
Pour 1 cup of boiling water over it. 


Wednesday, December 11, 2013

Getting close to bringing this tale to the current time.
But first I need to tell this. In January 1998, I emailed a friend with the latest news about  The Garden Palace. I told her about working on the stair wall because I was close to having the stairway ready to install. I'm so pleased that I thought to keep this documentation along with the photos because it included details that I surely may have forgotten by now.

For example, I told her about the creamy yellow paint I had chosen for the walls and that it had a very fitting name, Pollen. I told her I was using one coat of Kiltz first and then painting and that I was so anxious to have something pretty accomplished.

The most important information shared with her was regarding my research of the origination of this tiny house. As you know, in a small town everybody knows everybody. Because of this, I knew who the original owners were.

I talked with Bess (b.1910 d. 2011). Bess told me the First United Methodist church stood on that corner before the little house was built and her parents were the last couple to get married in the old Methodist Church. Her parents married in 1909.

Another church family bought the property and after the construction of the new First United Methodist Church on Coleman Street was completed, they tore down the old church, and built a boarding house. At the same time or shortly after building the boarding house (circa 1910), they also built the little house.  It did not connect to the boarding house but was very close. Much of the material from the old church was reused in the boarding house and little house. 

Bess was so excited that I had rescued the little house. She said she noticed it was gone but thought it had finally fallen. The most interesting thing Bess told me, was from its beginning the little house was used as living quarters for the owners two sons, Dutch and Ed.

Bess married Dutch in 1934. She said there was never a bathroom or kitchen and the children took their meals in the boarding house. The house never had water but there was evidence that an electrical line had been installed through the front wall. Dutch tore down the boarding house about 1982 and he passed away the year before I purchased the tiny house in 1995. Oh how I would have loved to visit with him about it.

Here is more of what I did to it.
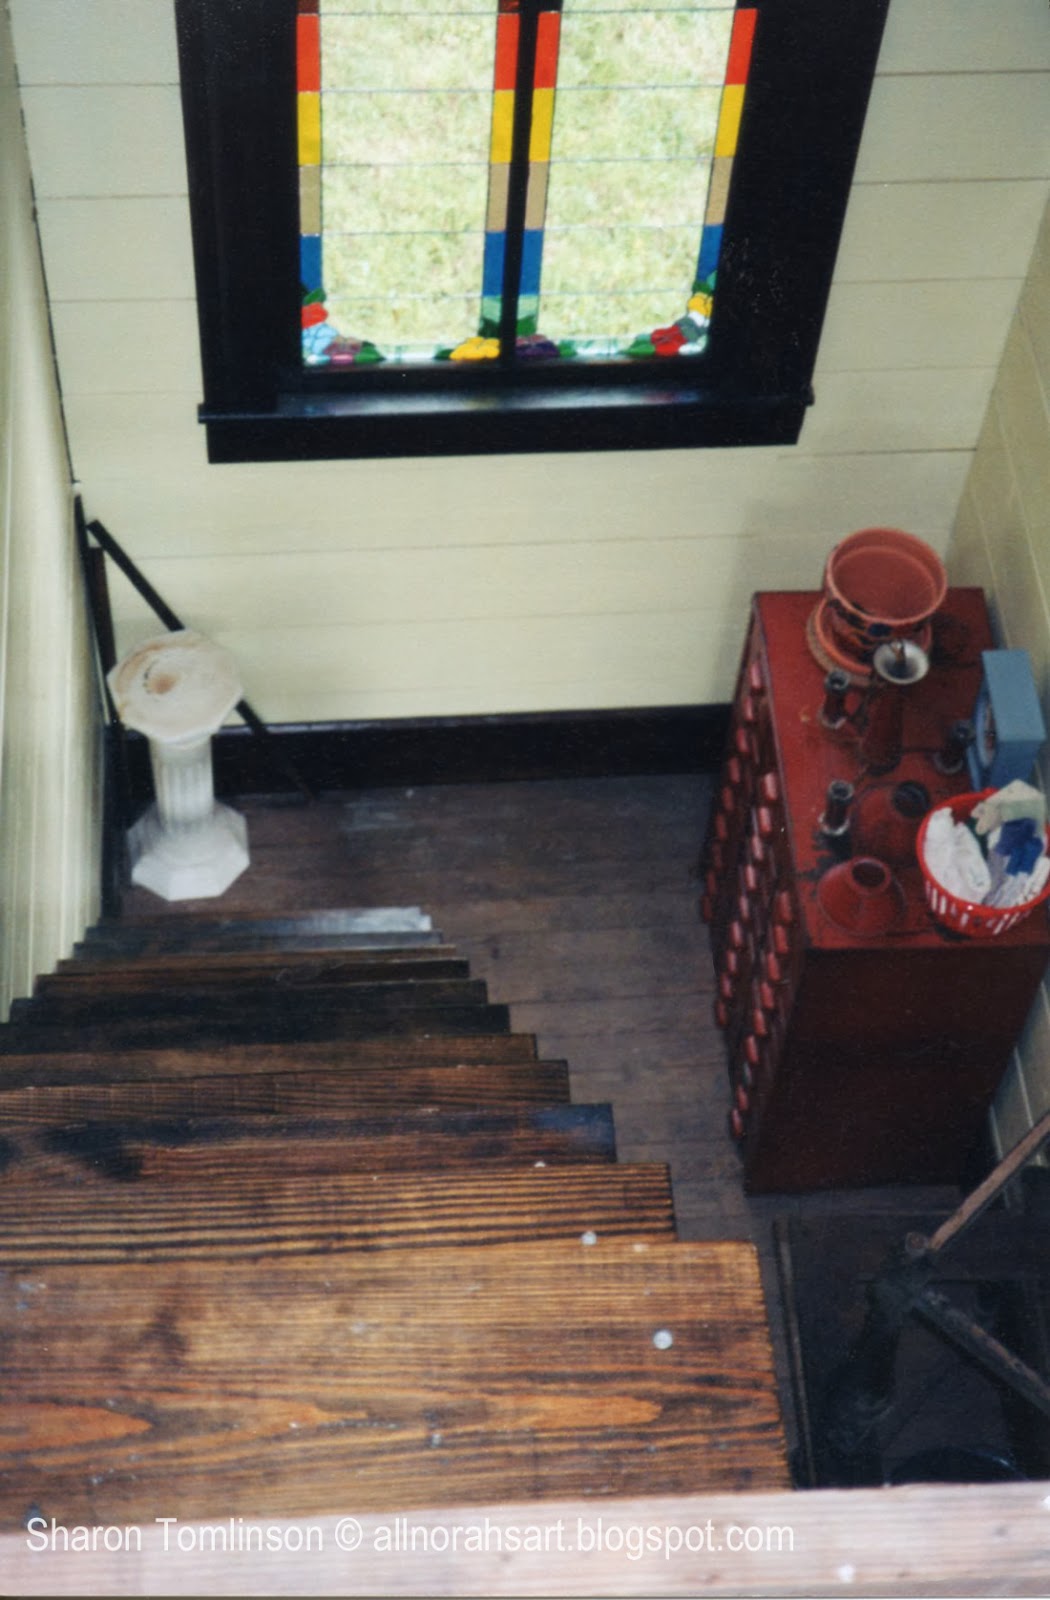
stairway to the attic
 The tiny room became the stair room when I enlarged the attic opening and I designed and built this stair case. 
looking down from attic


 In this photo notice the finished stenciled pansies.
I added a corner molding and painted the red stripe below the stencil area. 
Pay no attention to the little non-stenciled area to the left of the stairs. (yep, that's one of the first things on my new daydream list) 


 This was the beginning of the morning glory stencil. It started at the floor of this wall, goes up and all the way around the room and back down to the floor. 
It is finished and a blue corner molding was added as well.
roses in the parlor
The green board that I added around the ceiling of the parlor was painted and stenciled before I installed it. 

The parlor is the only room where I added molding under the stenciling. 

Now, I want to tell you when I say "I", what I'm saying is I was the carpenter on the job.
I learned how to use a saw, hammer and nails from my Daddy when I went with him to his moonlighting jobs. However, the only thing I remember doing was puttying the nail holes. 
Oh, and I do remember him telling me, "measure twice and cut once". A good thing to know.

I designed, cut, and installed the stairs, as well as all of the molding that I added with help from no one. 

You do remember the "... unspoken truce. He knew I was going to have it no-matter-what. I knew he was not going to participate no-matter-what."

All of the pictures I am sharing are from back then (1995-2001). This was before I had digital camera. Furthermore, it was long before blogging which could explain my lack of pictures. 

The last batch of pictures that I have are coming tomorrow.
Outside views of what it looked like in 2001.
to be continued.....


Tuesday, December 10, 2013

Time to see something pretty
back window
I knew before my daydream ever came true that I would be making the windows beautiful and full of color.

However, my goal was to to design and create the stained glass
  without blocking the natural light because my tiny house has no electricity.
And I never wanted it.
I have this dreamy notion of candlelight gatherings .
Can't you just imagine that? 
west wall window in middle room
 When the daydream became mine and after I had one window sash repaired so I would have the exact size, I started my stained glass project here in my studio.

Of course, The Garden Palace would have a garden theme.

The 'L' shaped middle room has a morning glory theme. 
tiny room window
The theme in the tiny room is pansies.
This room is the only single window.
I presume it may have been a dressing room.
And may have even had a chamber pot.

parlor window on front
Roses adorn the parlor.
Of course.
west wall in parlor
 Stupid kitty goes over with me now and seems quiet comfortable.

front door
The parlor has three windows and I don't seem to have a photo of the other front window.
I spent untold hours during every spare moment cutting glass for five double windows, one single window and the last one for above the front door.

All the while, going to the office from 8 to 5 and working in the garage on the window sashes.
some windows installed 
When there was daylight I was at the little house prepping walls for paint, painting and stenciling and building steps and stairs. 

more about walls and building coming 

ps...did no notice the view looking out each window?