Showing posts with label Work in progress. Show all posts

Monday, November 11, 2013

My Wrap-up of San Miguel

Sketch
I don't know about you but I seem to never finish my retreat art while on the retreat. 
For me it's not about coming home with finished art pieces.
I enjoy myself and take in as much as I can.
I fully enjoyed making this charcoal sketch for the inside of my triptych while in San Miguel.
And I'm happy I didn't rush the process because I am truly learning to love the charcoal sketching process.


When I got home, I finished it with paint. 

I have a personal challenge when traveling to retreats.
For one thing, I travel very light knowing I have to be able to manage my own luggage.
So, one thing I do is take only the supplies that are called for, with one exception. 
It is very tempting to take all my go-to supplies and tools.
You know, things you think you can't create without. 
I know you know what I mean. 
So, I allow myself to choose one thing that wasn't on the list. 
I purposely choose something that I don't use everyday.  
My tube of Golden Iridescent Gold (Fine) is what I took on this trip.
What you need to know is there was not one single tube of paint on the supply list. 
Of course I was sure that was an oversight and quickly shot an email to Rebecca to confirm.  
Nope, bring none!
A special colorlicious Mexican paint would be provided.
Katie provided us with the above image.
And I'm sorry to say, I don't know who the artist is.
I glued the image and then did a paint over. This I did finish in Mexico using liberal amounts of the Iridescent Gold mixed with every color.

I also finished my pouch that all the new art pieces fit in.
We each brought a piece of canvas that we used as a work surface while painting.
We cleaned our brushes and used up left-over paint on the canvas.
Then on the last day we each created a pouch.
We all shared many of the little scraps and they became a symbolic bond that connected each of us and the memories we made together.
favorite door
Many doors and portals await one in San Miguel.
This was one of my favorites.
couldn't pass up the selfie
I love these pictures.
My happiness shows.


Thursday, September 26, 2013

Sister Friends show up on Catrina ATCs

Catrina ATCs
Do you recognize these girls in face paint?

Catrina face painting in progress
Much to say
and
I don't know where to begin.
So, first I guess I shall share that I am going to Mexico next month which should explain why all of a sudden I'm painting Catrina faces.
I need many for an ATC trade with other artist.
New paint palette
But mostly I wanted to share with you;
My new paint palette.
What led to it.
and
Although early for a full-on review...

I'm sharing some of what I know so far.

First, what led me to a new palette?

Well, if you have taken one of my online classes,
you know that I use a very tiny homemade palette.
Which is for the purpose of getting the view of the palette in the video instruction. I feel it is helpful for the student.

Second, while I haven't painted much this year, I started painting much larger canvases and on a humongo easel.
and
still using that tiny homemade palette.
It was time to get loose with paint.

I realized that I was still in the pre-retirement mode when I had only short time periods to paint and didn't want to lay out a palette and let the paint go to waste.
 
I needed to make some changes and get out of the pre-retirement mode!
That's when I happen to see this post about her paint palette.
In her video, Gillian Lee Smith, told about using a Masterson Sta-wet palette.

I decided, it was time I should give it a try. 
After all, I was painting huge and needed huge quantities of paint out. 
Hahaha
Except for my big journal page (previous post) the "big" paintings I am doing are these 2.5 inch X 3.5 inch little ATCs.

Here's what I know so far about the palette:

  • Trying to mix the three pools of dark, medium, and light values in the middle was very awkward for me. The palette sides seemed to be in the way and I kept getting my hand and arm into the paint already laid out around the edges. A different palette knife will fix that (I think).

  • I may have left the sponge and acrylic film palette too wet. As you can see, the paint looks and is very runny.

  • When I needed a color that wasn't out, I found myself reaching for my tiny homemade palette. Maybe I need two of these.

  • I didn't do a good job of laying out the paint around the edges. I'm sure I will do better the next time. 

  • Only once when unexpected company from Oklahoma showed up did I walk off and leave the top off. When discovered, several hours later I put the top on and it seems to be just fine and juicy.

  • I'm sitting at my desk with the palette and little ATCs. However, I'm trying to think how I will situate me, my humongo easel and new filled palette when I start on a large canvas. 

  • Yes, indeed I think my paint will last a long time and I won't be wasting dried up paint.

  • And I think the bonus is, I am more inclined to sit down and paint knowing the paint is right there waiting for me. 
LOVE THAT!

Friday, September 06, 2013

A New Art Apron from an Old Blouse

New Apron Back
The blouse before destruction
Destruction

Art aprons make me so hot and yet, I must wear one; otherwise, all of my clothes would carry the evidence.

So this weeks creative venture is to make a new art apron with very lightweight 100% cotton.
Of course the making has to be fun.
And I think you can decipher what I have done so far.
My plan is to bind the raw edges by hand stitching and embellishing with cloth fragments.
Inspiration is from Jude Hill. I am enjoying an online class with her called What If Diaries I.


Friday, August 09, 2013

Sisters Tutorial 4th post

This is the fourth post in this tutorial series. You can scroll down to the beginning if you missed it. 
You may remember that when I get into the flow of the painting and it is just me and her, I forget to take photos.
So, I thought today I will share the painting of two hands showing how they progressed.
 My preliminary sketches showed more of the body and the hands were extended. I changed because I wanted the heads to be larger on the canvas. The challenge then became how to add hands in a way that would read believable (without painting the arms). 

So far so good, I think. 
I'm not yet sure if I will add a third hand. 
I'm thinking about it. 
I will confess that with each hand that I add to a painting, I feel a little trepidation.
Then when I go ahead and go-for-it, I am elated.

I'm headed to the easel now and hope to finish this one in today's session. 

Tuesday, August 06, 2013

Sisters tutorial continued

You might like to go to this post, Do You Remember the Sisters? for the beginning of this tutorial series. Then, The Cello Sketch for the next installment. Or just scroll down.

I was very anxious to see how the technique with permanent marker and alcohol would work on canvas.


But first, I wanted texture or rather I didn't want much canvas texture. I used Golden's Light Molding Paste #03575 to prep the canvas, as well as, multiple coats of acrylic, and gesso. 

After I did my quick Sharpie permanent ink sketch (above), I heard that little voice that said, "this is not going to work" and "why did you need to try it anyway?"

I knew immediately (when the light bulb when on) that since I had prepped the canvas with acrylic products, the alcohol would start to dissolve those products instead of moving the ink around on top as it did on the cellophane. 

That is exactly what happened. 
As if that wasn't bad enough, I knew the Sharpie marker would bleed back to the top. However, I thought I was in control of where and how much would come through.
That was the part I was excited about. 
Anyway, fighting failure, I painted layers and layers of paint and gesso, I eventually painted black gesso over it and left it for several days before I once again painted a layer of grey acrylic just to see if the sharpie marks were coming back.

They didn't!
Why?
By this time, I knew I wanted to use the girls from the cello sketch because I loved their personality. 
And since this was inspired by the "sisters" from long ago, I decided to use the transfer technique just as I did the series long ago.

I scanned the cellophane sketch, printed and cut apart the faces. Above pic shows the beginning of another preliminary on paper. This was to get the placement and scale using only three of the girls.  
Once I decided which three girls, I had to flip the images horizontally and print a copy of the size I needed.

I used my laser printer but ink jet works just fine too. I brushed the print with Golden Regular Gel (Semi-Gloss) #3040 and placed the faces in position ink side down. Then I use a stiff edge like a credit card and squeegee over them to make good contact with the canvas.  After is sets for a little while, I use a slightly damp cloth and rub over the print. That is the stage above where the image begins to show through. 
Using my finger, I gently rub off the paper layers....slowly.....but surely until...

...all the paper is gone. If a little paper fuzzy remains, I lightly sand over it before sealing the transfer with Golden Matte Medium #3530. In the photo above I have started painting with white paint.

One more thing, before sealing, I like to work the edges of the transfer a bit with the damp cloth and my finger to blend the hump of medium with the canvas. This is not necessary. I just don't like seeing the edge. 

Work-In-Progress
.....to be continued.


Monday, May 06, 2013

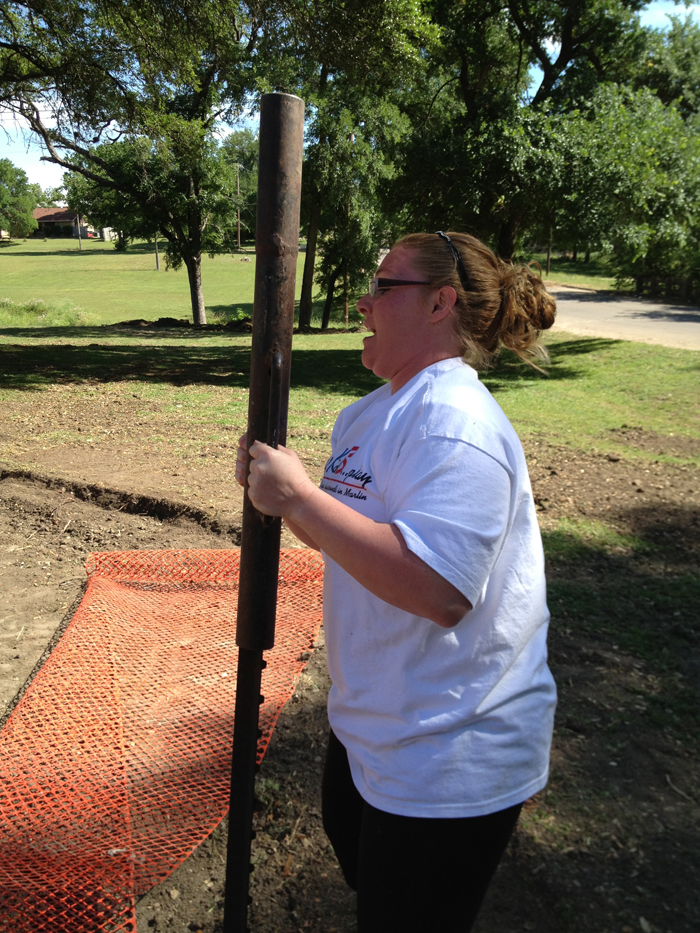
It Takes A Village

 Friday evening getting ready for the big Pre-build day Saturday.

 We three laid out and marked the path.


And then......
the Big day
started at 8 am
and went like this until.........


Ashley drove it home at 4:31 pm!!!
WOW
what a day!