
 HeART Tutorial
I was up this morning before 6 o'clock. That would be because I was in bed last night by nine pm.
I planned to finish up my valentines. I got a batch mailed yesterday. I also must finish the altered book that I am donating to the Library fund raiser. And the house needs blessing. You know what I mean?
All of this is to say that I was possessed this morning with you know who...norah's here...
.....and when I started this, it occurred to us that it would be fun to do a HeART tutorial. So........ here goes.
This is a little plaque that I got at the $$ Store before it closed. It was really really cheap and I thought it would be good to do something on as it has a little hanging hole on the back. That is why I bought it, to alter.
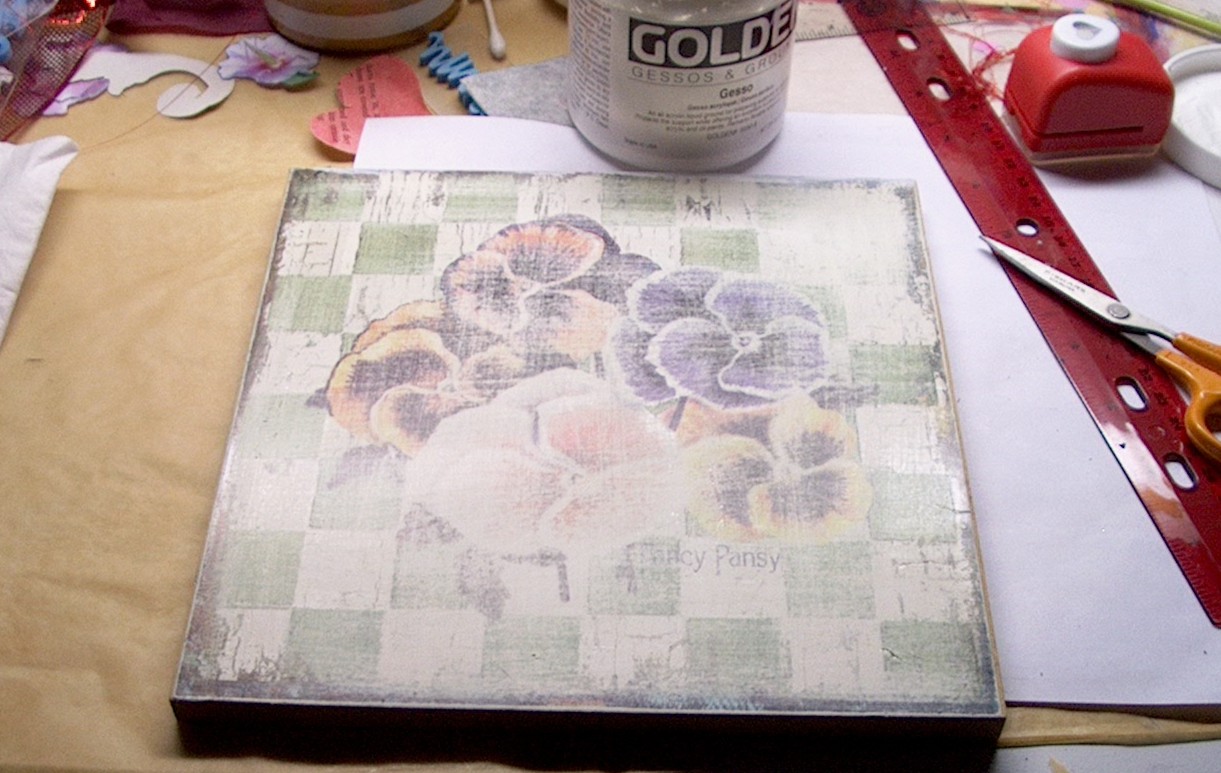 I have sanded it to get rid of the slick finish.
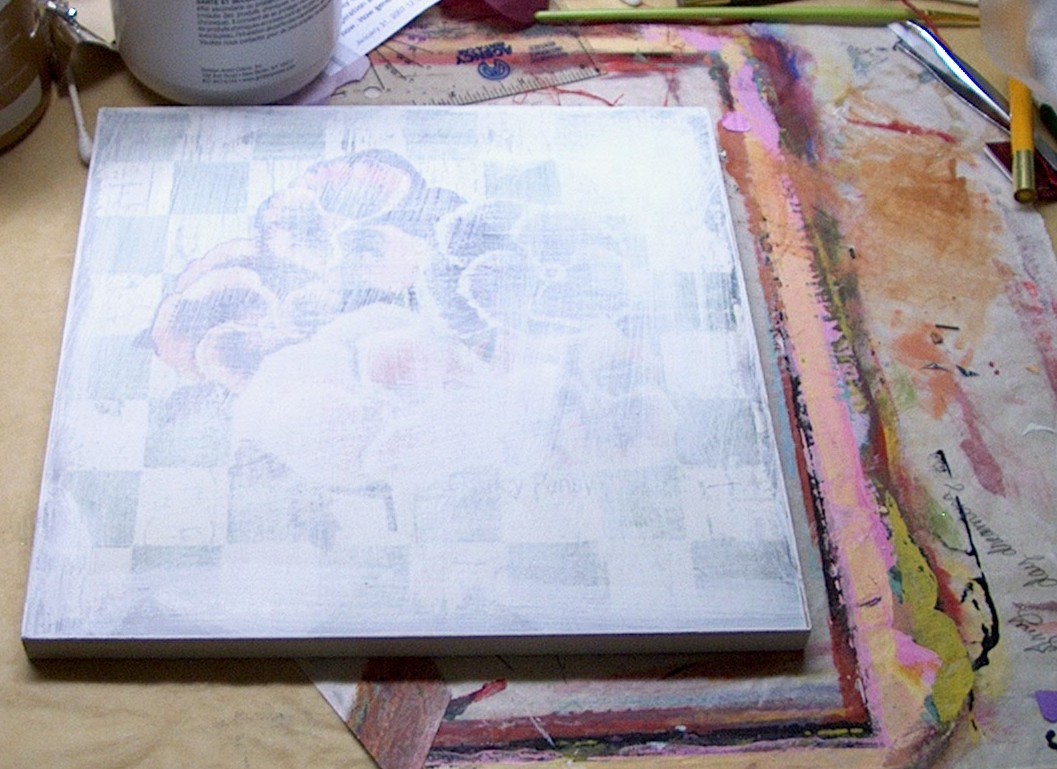 Here I have Gessoed it but didn't try to cover up the flowers. It is OK with me if they shadow through but I didn't know if they would or not.
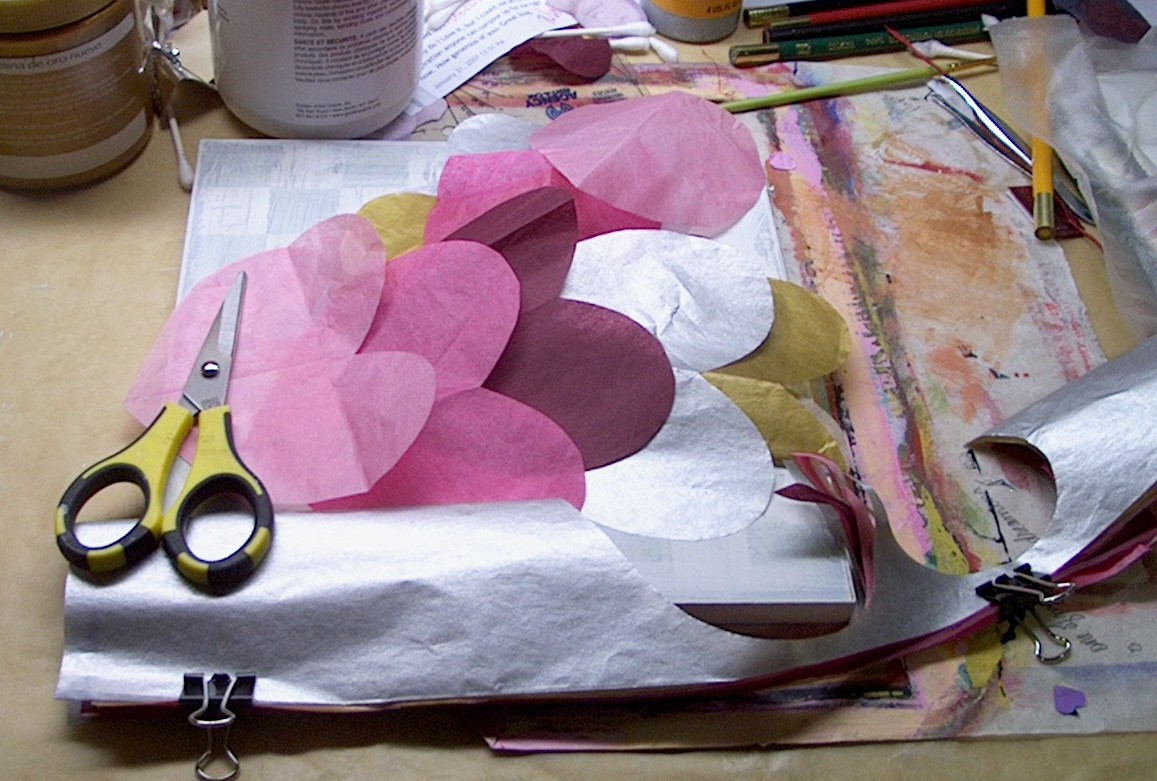 I got out the tissue paper and proceeded to fold a stack of it together and cut hearts. Just like we always did in school. Notice the clips holding the tissue.
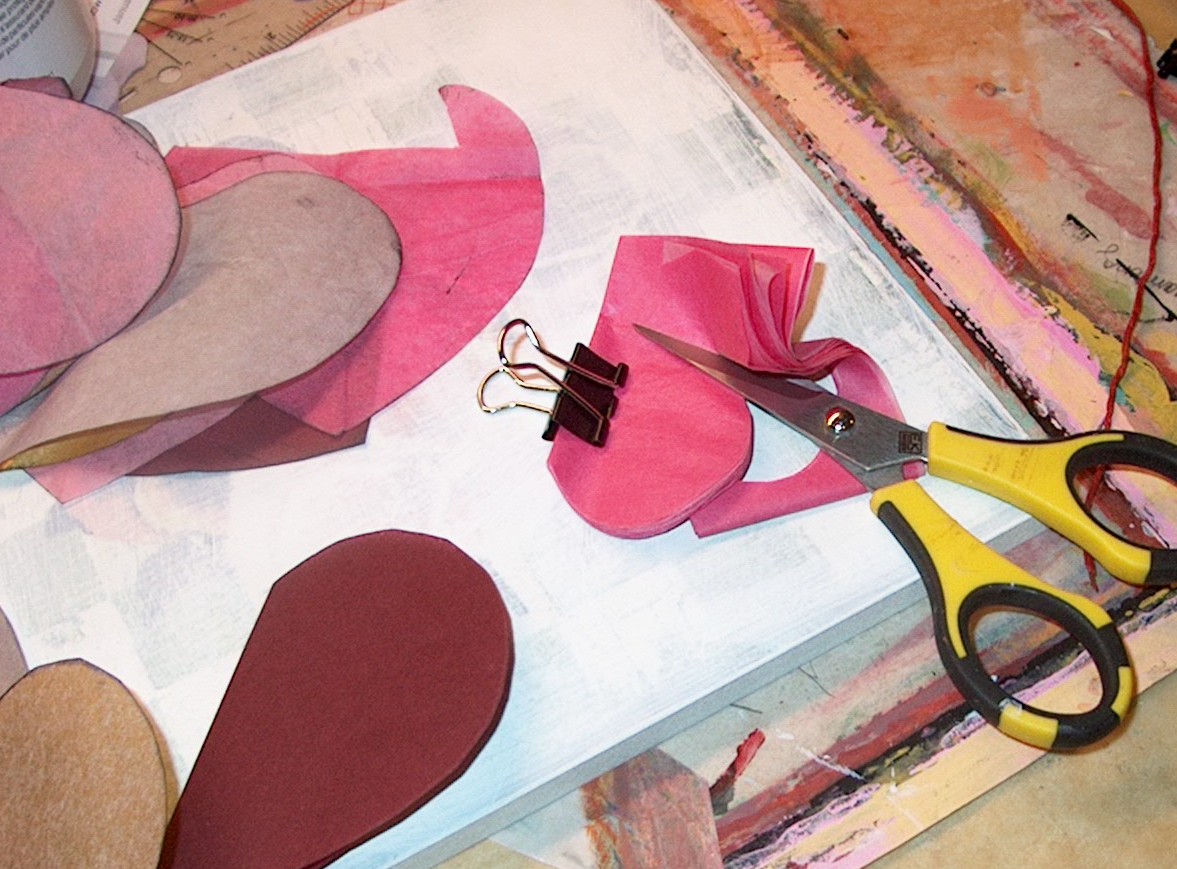 I figured out that the clips needed to hold the fold of the tissue where the heart is going to be cut out. Not the edge left after cutting. Because.........
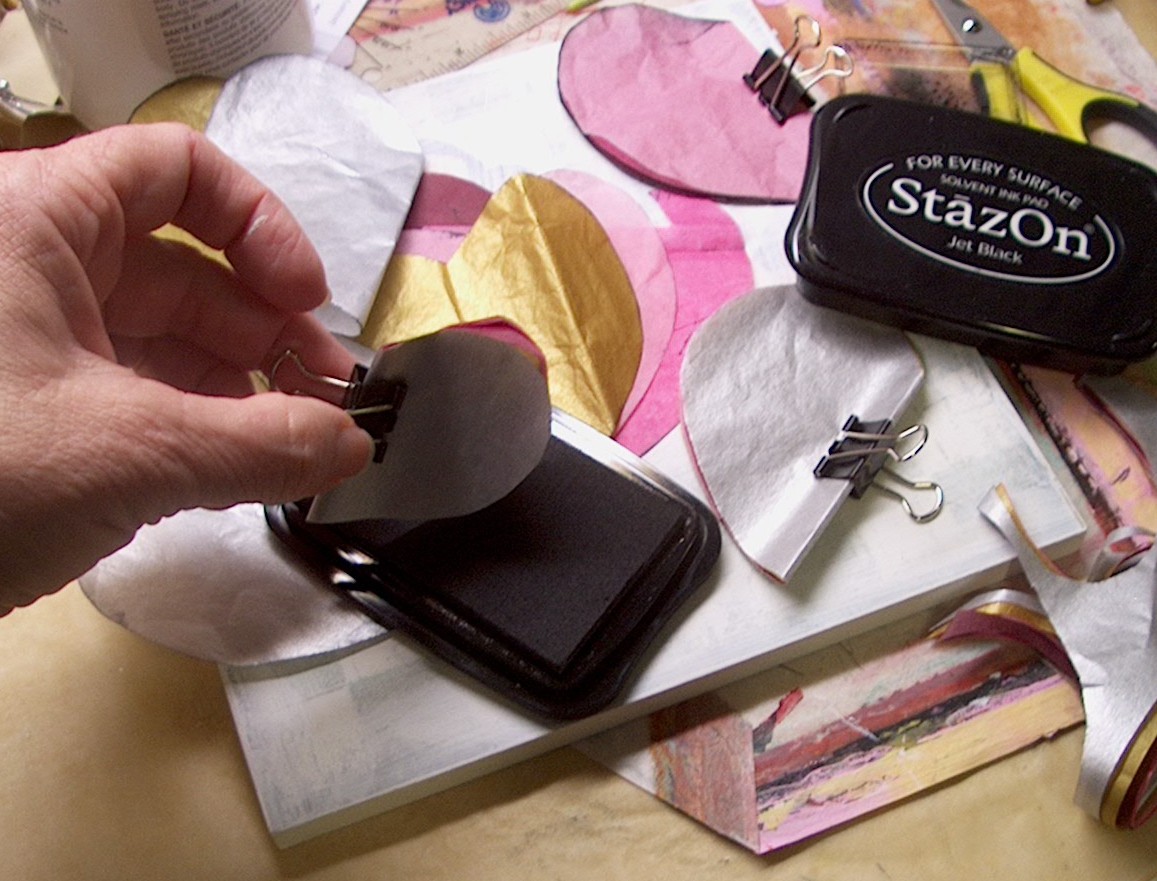 The next step is to smudge a little black edge around the hearts. Now I know everybody knows how to do that. But tissue is very flimsy and works best if you do the whole stack at once. So if the clip is in place before you cut the heart, then you can rub the edge on the stamp pad. Wa la!!
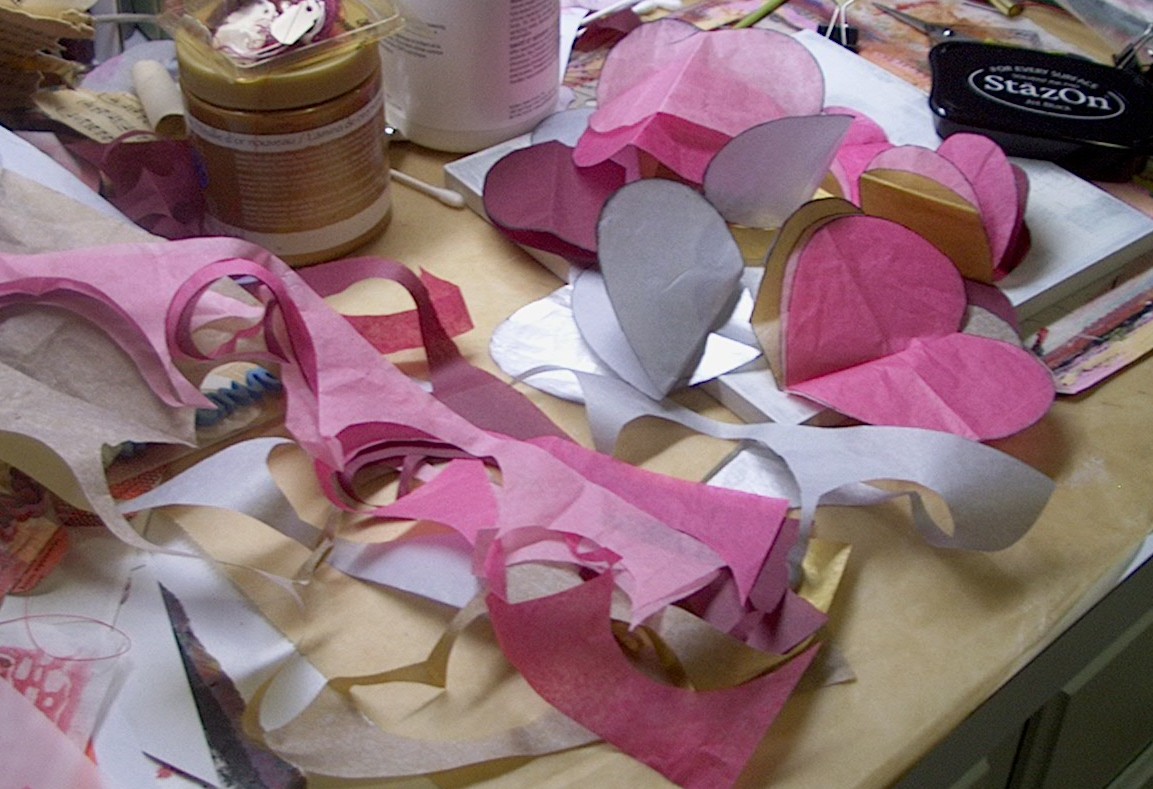 This is to show that I keep the scraps of tissue. May use it later to cover the edge or any place left between hearts.
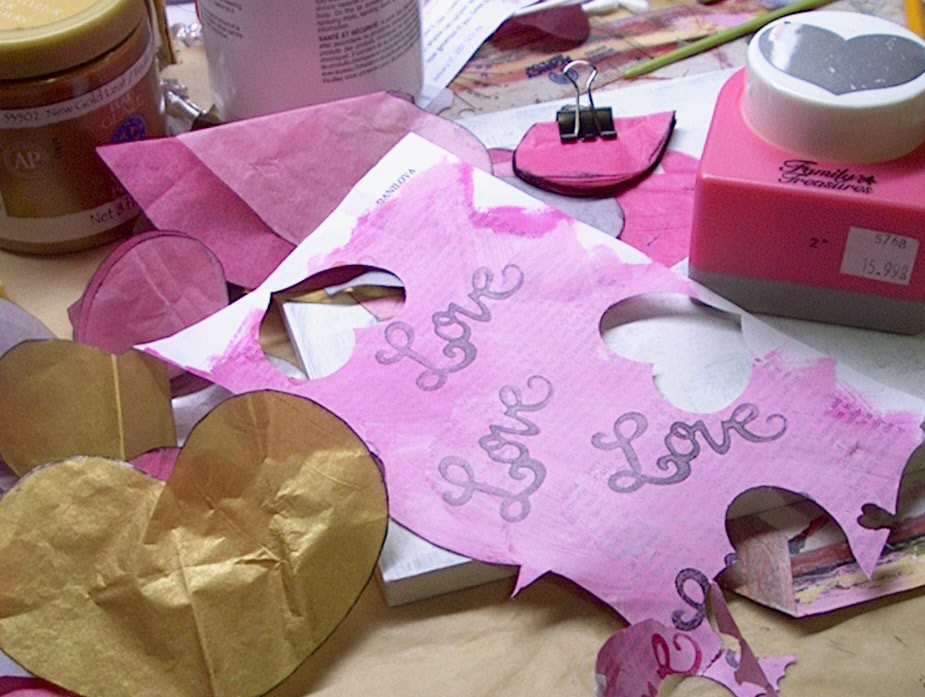 Remember this paper. I need it again...now.
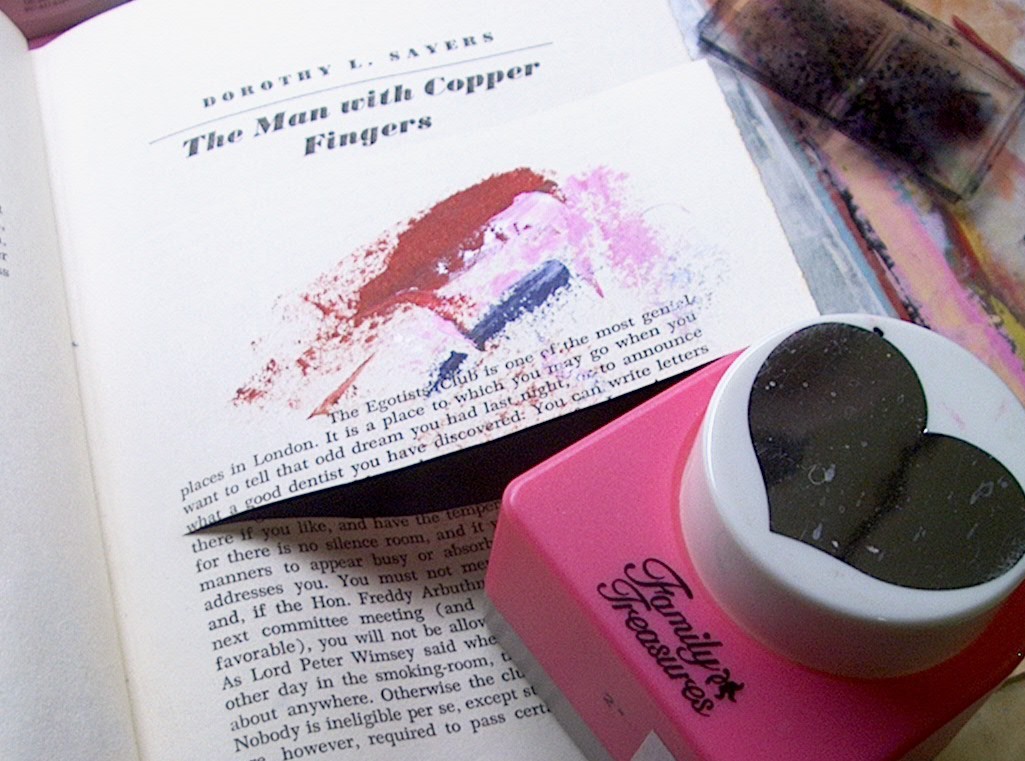 And here is another little spot of paint in my book where I clean my brush. Notice I'm just going to get the heart and leave the page in tack as I really like that title on the page and...... (oh dear norah's at it again)............................
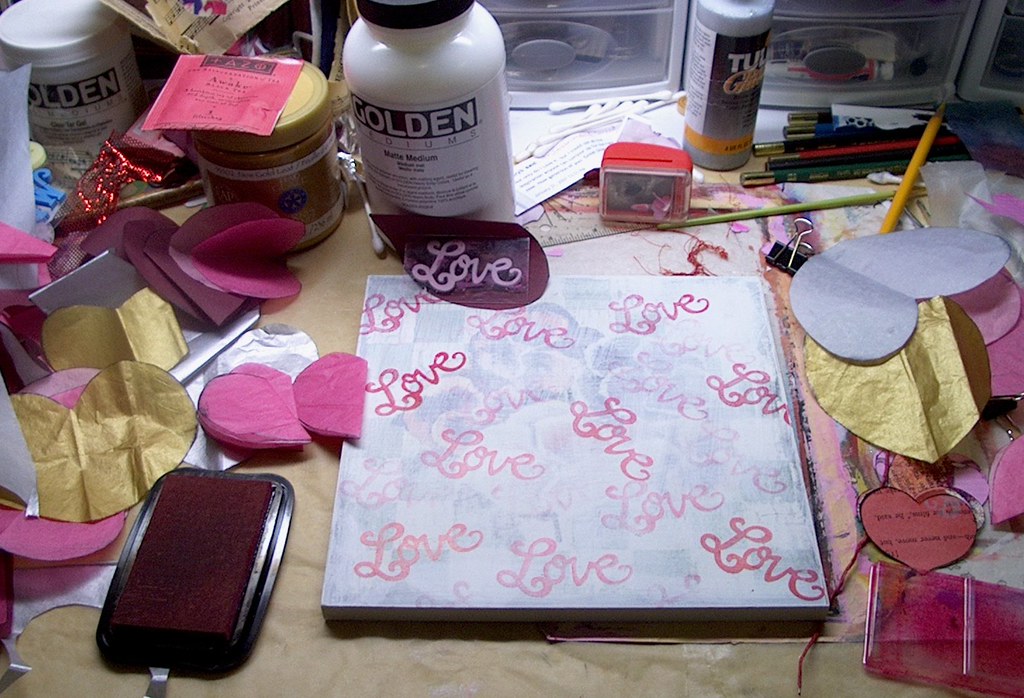 Here I've used my lovely little Love stamp and kissed the board over and over again.
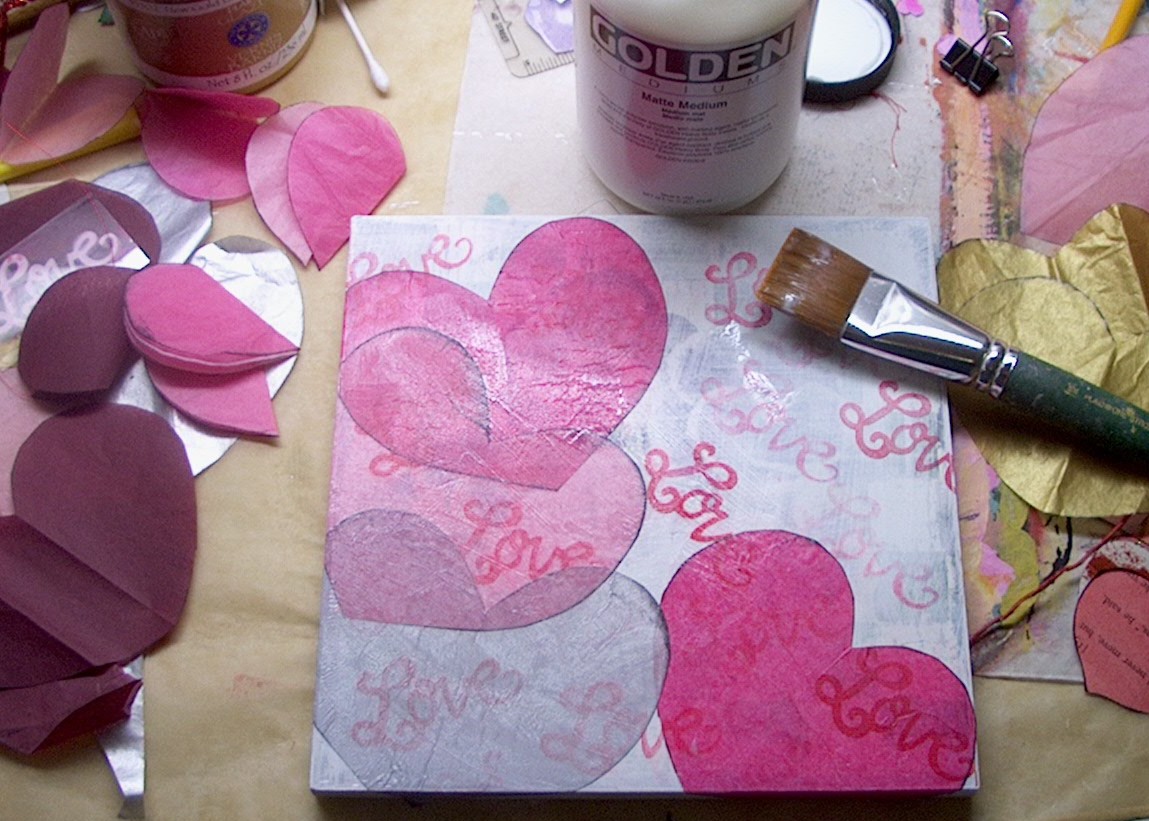 It's time to start the collage. As you can see, I use Golden Matte Medium; however this is one of those times that Mod Podge would do just fine. I didn't tell you but the problem I had with Mod Podge was that the pages of the altered book stuck together.
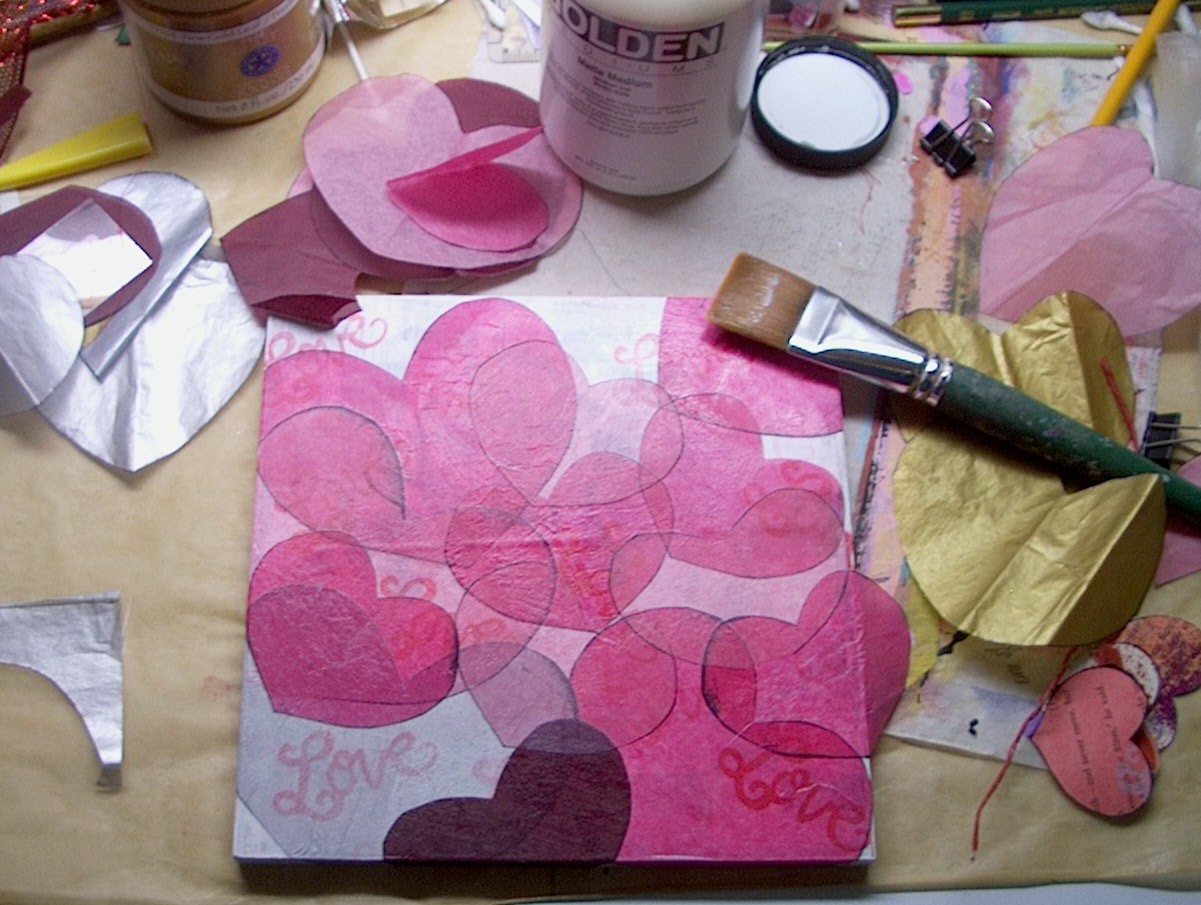 ..................................More hearts.
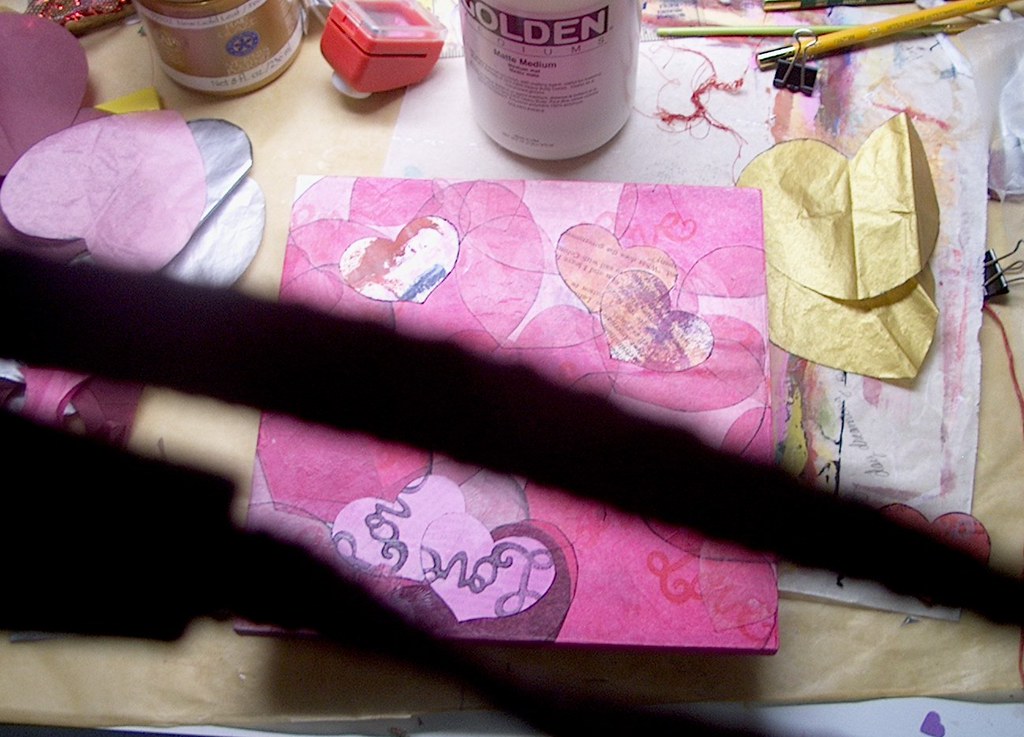 Here I have finished the collage of hearts. I snapped this picture and didn't know until I loaded them to my computer that the camera strap is making a big, black, almost diagonal, hash across the collage. Do you get it and do know why??????????????????
 We didn't like it and called......DO OVERS ......................
I decided I didn't like it because I didn't like the size of the hearts. I didn't like the silver or maroon heart and I thought I would want a layer of big hearts. Turns out, I didn't.
So, I got out my Golden Zink White because it is translucent and Medium Magenta because is is pink and using the matte medium, I just painted over the collage, but letting some shadow through. At this point, I really didn't know what I would end up with. Sometimes, you just have to listen and do it.
 This time when I picked up my lovely little Love stamp, I had pink on the pallet. I used the knife and spread it thin and then used the stamp in pink paint instead of red ink.
 I cut more hearts, smaller and only used two shades of pink. And this is the heart collage I ended up with. I really can't see the "Love" on there too much but that's OK. If I wanted to, I could use the stamp again now. But I don't want to. I like this much better....at this point.
From this point, you can do your own thing. This is when it becomes yours and not mine.
This time when I picked up my lovely little Love stamp, I had pink on the pallet. I used the knife and spread it thin and then used the stamp in pink paint instead of red ink. I cut more hearts, smaller and only used two shades of pink. And this is the heart collage I ended up with. I really can't see the "Love" on there too much but that's OK. If I wanted to, I could use the stamp again now. But I don't want to. I like this much better....at this point.From this point, you can do your own thing. This is when it becomes yours and not mine.
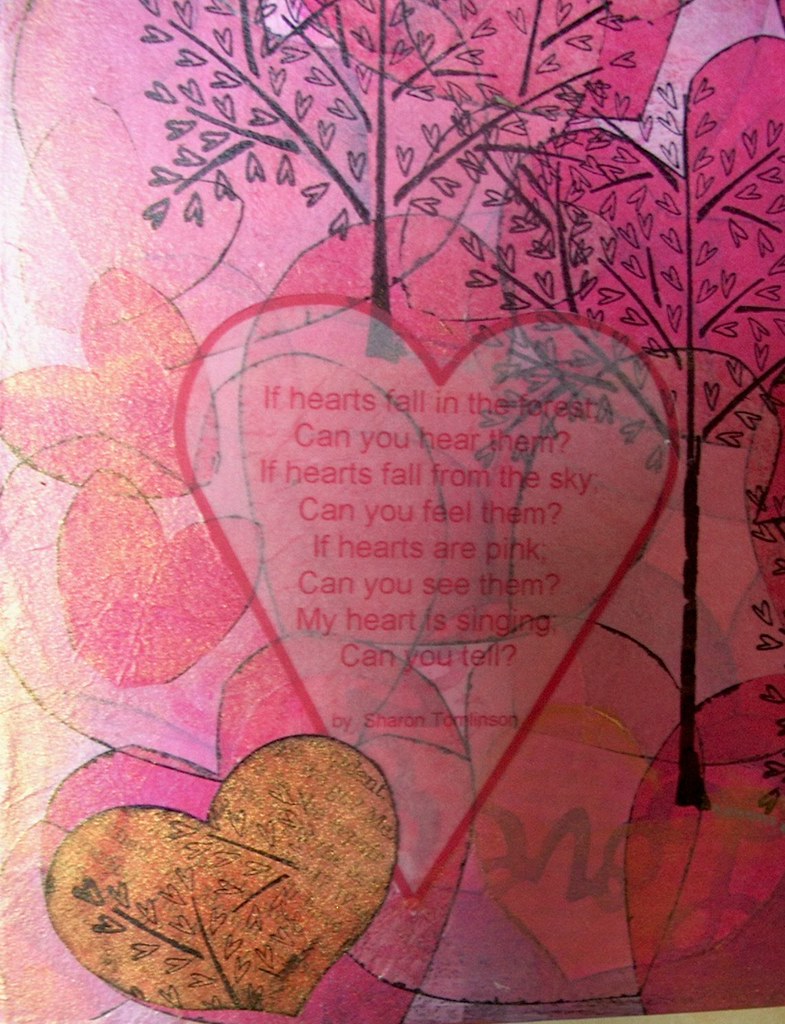
..................................Here is what I did.
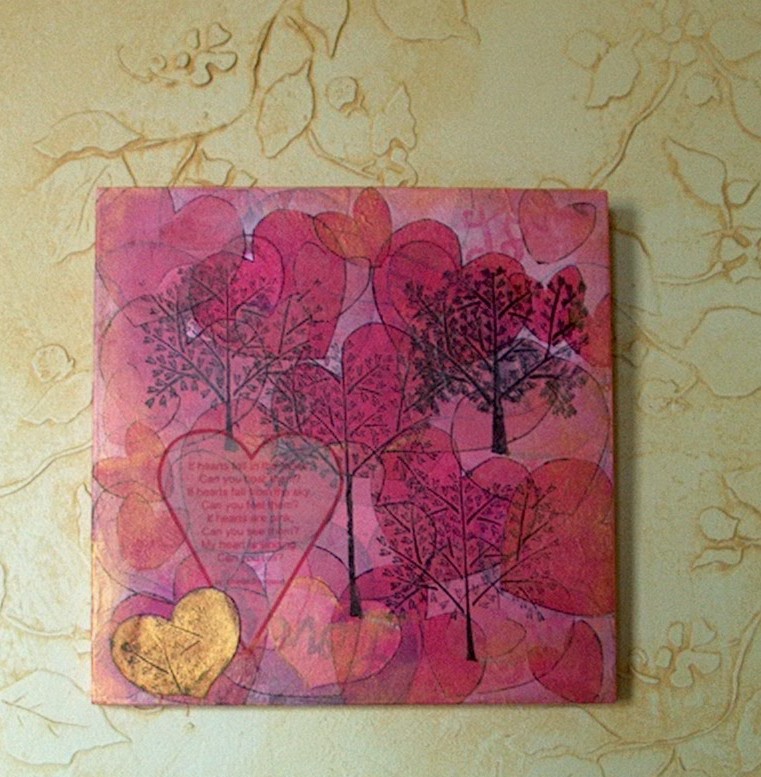 Although, I messed it up with the stamp slipping on the tree at the top right, I like it OK. Also, when I put the poem on, I didn't put it where I planned. It is too far to the right just a smidgen. The poem is printed on vellum. But I have learned over and over again that you can't glue vellum. So I used my Xyron and once it was down, there was no moving it.
Although, I messed it up with the stamp slipping on the tree at the top right, I like it OK. Also, when I put the poem on, I didn't put it where I planned. It is too far to the right just a smidgen. The poem is printed on vellum. But I have learned over and over again that you can't glue vellum. So I used my Xyron and once it was down, there was no moving it. Well, I think I will have DO OVERS again but on something different. Maybe a canvas or Book Cover or Watercolor paper or wooden board, or how about a piece of glass, or a wooden chair, or maybe my art journal, or well.....you get it...do it on anything.
More later,
Sharon
I need to know did you like it.?
Love this. You make it look so easy and I love that you can just paint over if you don't like it.
ReplyDeleteThank you.
I do like it! I do! The repurposing of a dollar item is always a good thing!
ReplyDeleteThe trees are my favorite visual on the piece. *i must find a tree stamp*
I also love it. I might even try one someday. Knowing that I can just do it over if I don't like it. Stamps I have, but I can't draw a stick figure to save myself. You're a true inspiration~~Thank You
ReplyDeleteI love all the soft layers. I've got a bunch of Heidi Swap tissue flowers. Think I'll have a play with them. Great tutorial. Thanks for sharing.
ReplyDeleteThis is beautiful. For a newbie like me, tutorials are great. Thank you so much. I especially like how you used a dollar store item as your base and made it look like a million bucks.
ReplyDeleteI love the plaque! It's so vibrant and eye catching. You just want to look at it :)
ReplyDeleteI like it a lot and I like the fact you let your intuition guide you - great way to repurpose something ordinarily passed over.
ReplyDeleteThanks again for the how-to! My altered book is going slowly but I manage to prime or paint a base page everyday. I thought I was the only person photographing their camera strap!
ReplyDeleteBeautiful!!!Thanks for the tutorial! Inspirational as always!
ReplyDeleteSharon,
ReplyDeleteIt looks great! I love all the layers of pink hearts. The tree stamp is cool and so is the gold heart at the corner. And I like how the pink Love stamp still peeks out.
Cheryl
Thats me above- wouldnt let me sign in! Ughh!
ReplyDeleteCheryl
sharon, what a wonderful tutorial! thank you for taking the time to do that. i am inspired now to use tissue paper. and make a trip to our local dollare store.
ReplyDelete:0)
The touches of gold are pure genius--great visual impact and enhancement. Learned a lot of tricks from just this one tutorial!
ReplyDeleteOh, I just found your blog and LOVE it! And I love your art piece here, too! Your tutorials are priceless, particularly for newbies like me who are trying to soak up as much as we can! Thank you so much for sharing. Gorgeous work!
ReplyDeleteinspiring!
ReplyDeletelove the stages and images of your creations unfolding, delicately put together!!