Bonnie, one of the co-host of the Cabinet of Curiosities challenge ask if I would share with her the preparation steps for playing art in board books. It is really quite simple and I could tell her in a few short sentences but...well, you know me. I love showing how and telling so here is a little tutorial for Bonnie. This way I can add a few of my little tips.
 So here is where I'm about to play. I think it is fun to see other artist studio play space so I'm giving a little glimpse of mine. See how all the fun stuff is closing in on me and yes, I haven't put away anything from last night's art party.
 Do you see the shiny on the book? Well just use a little piece of fine sandpaper and rub away. Now here is a tip. Notice that I have put a wash cloth under the book. This is to grab or catch the sand dust as it comes off. There will be more than you think.
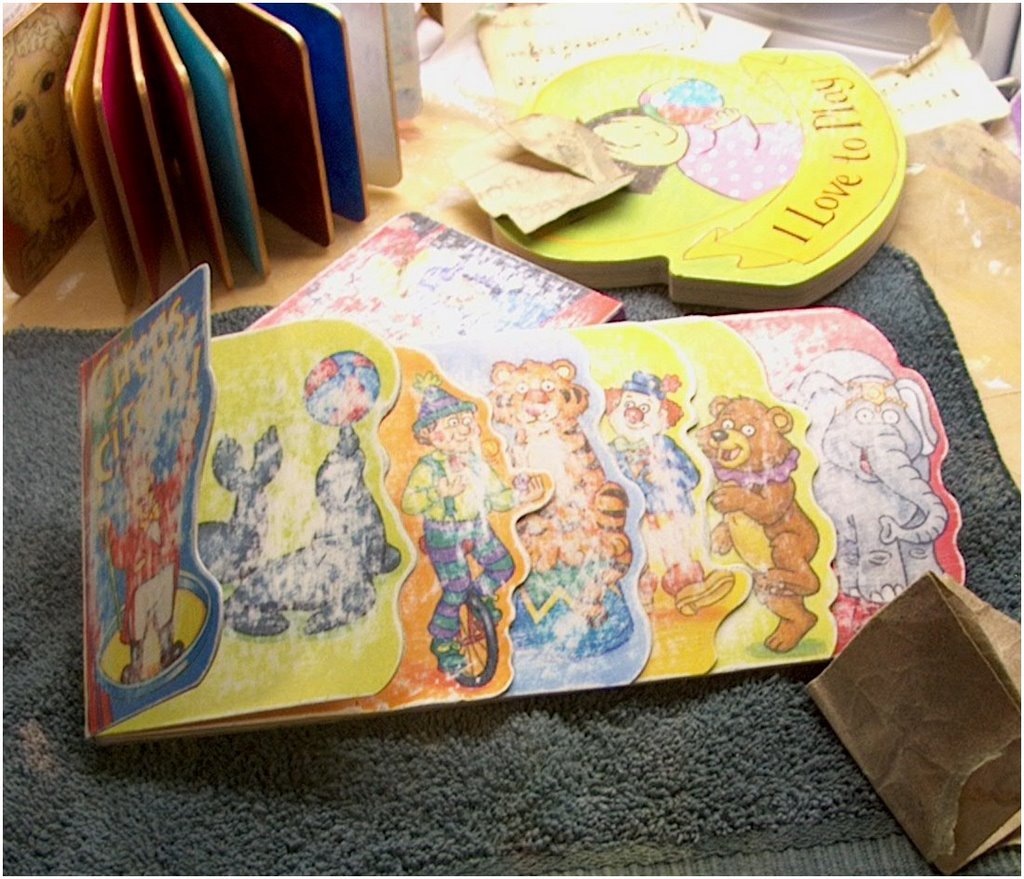 Notice here that I did not try to sand the image away, just the shine. In some cases you may want to see a bit of image or words in the background. The little board books are so fun because they are so sturdy and come in different shapes and sizes.
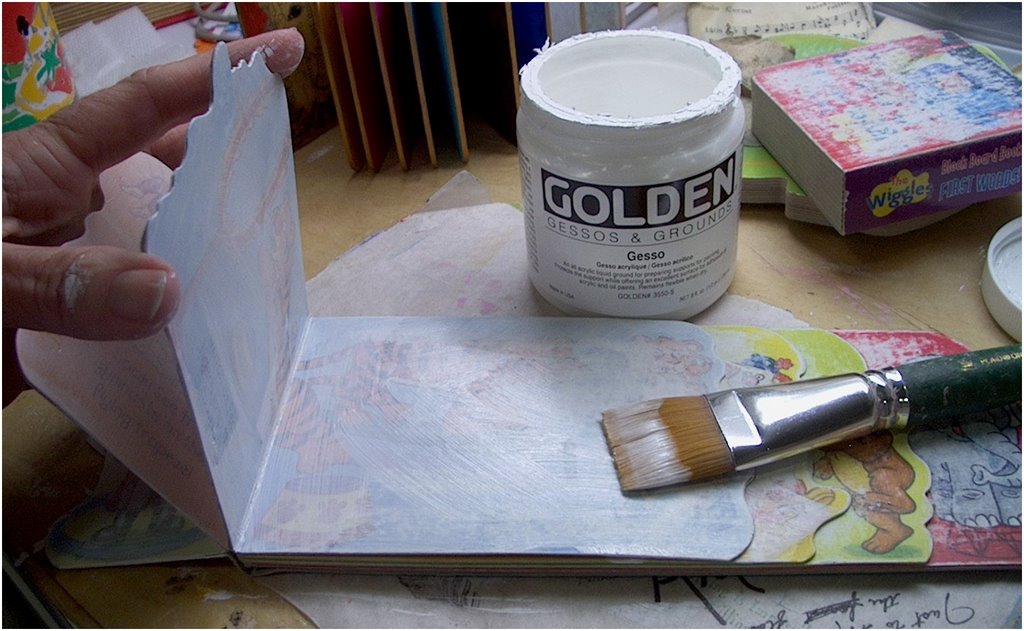 Any gesso will do. I happen to use Golden and I really like. This step is to just paint a coat of gesso over the whole book. A thin coat will dry pretty fast and because the pages are "boards", you can pretty much keep going with the gesso until done. But here is another tip: if you work on more than one book at a time, just switch back and forth. This will give a little dry time and will keep your brush busy so it doesn't dry out.
 Let it stand to finish drying. If you are impatient, use a heat gun to speed up the drying but it really doesn't take very long.
 Bonnie wanted to know what paints or products I use. That would be Golden but I guess you can see that. I'm sure any acrylic will do just fine but I do think the tube or heavy body acrylic is best simply because they will dry fast. Now here is another tip: paint right out of tube and you lose none of the precious pigment on a pallet.
 Painting is the fun part for me. Painting right out of the tube I just keep adding colors and building depth with the paint layers. And here is another tip: notice how dry my brush is. I usually go from tube to tube and page to page without washing the brush. Saving paint. In other words each page will have a color from the one before. Like green follows this yellow page and what makes green? Right. A little bit of yellow with blue.
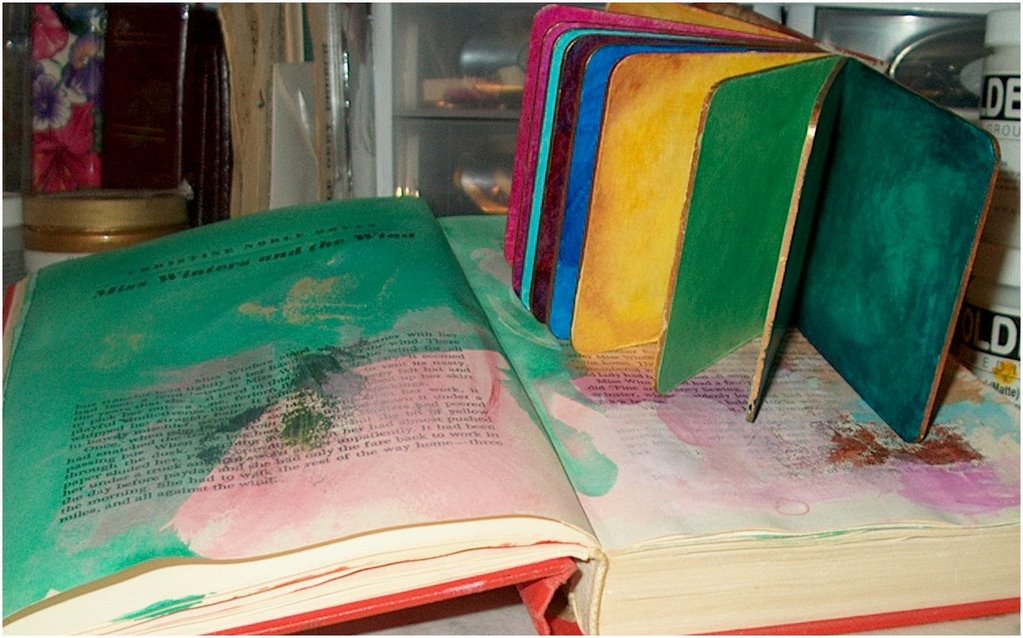 This last picture is just to give you the Tip of the day: I keep an old book handy right beside me to use when it is time to clean the brush. I first wipe the brush on a page until no pigment comes off and then I dip (I don't swish) it into my water jar and paint a page with the wash of color. Very little paint gets wasted. Then I swish to clean the brush. You never know, on another day, I will need just such a piece of paper for a collage or whatever.
I hope this helps, Bonnie. As you can see, it is very easy. Hey, if anybody has some tips...leave us comment. Thanks.
More later,
Sharon
Beautiful photos of your work space and beginning stages of the book. I have to start a little book of my own now. You inspired me... Can't wait to see more.
ReplyDeleteWow, thanks so much for this fabulous tutorial!!! The colors you are using are just lucious!!!!
ReplyDeleteThank you so much Norah! This is fantastic and so helpful and useful! I have made notes and will also link this tut on my blog for others to see! Thanks so much for the excellent photos and "how to"!! I love it!I think these little board books are fabulous and want to try one! I will be sure to post pictures when I do-just need to get some of that golden stuff and the acryrilic paint.One more question-since I live in South Africa, we might not have that golden gesso stuff. Could you let me know what it is exactly so that I could get something similar if they don't have that brand here? Thanks so much again!
ReplyDeleteAwesome tutorial, Shannon! I need to find some of those acrylics! smiles...
ReplyDeleteThanks for your helpful instructions. I'm really enjoying the challenge but your little board books are so inspiring I'll have to try one ... next time!
ReplyDeleteSorry I didn't realize your name was Sharon and not Norah! Apologies!
ReplyDeleteSharon,
ReplyDeleteI'm glad you joined the challenge! What a great idea for a kids board book... I think I could find some of them too!
Cheryl
ACK!!! I love it! Who knew!! I think I might have a new project! This is awesome and thank you so much for sharing with us!!
ReplyDeleteI have a little board book I bought just for this purpose but could never seem to get started. Thanks to your tips I know where to start now. Thanks!
ReplyDeleteThis tutorial is so helpful and full of tips. Thanks for sharing, it will help me a lot! ;)
ReplyDeleteSharon, This is a fabulous tutorial! I have always wanted a good tutorial for this project. thank you for sharing this. I love seeing you work in your studio too. I want to come over and play art!! xo Lia
ReplyDeleteI have inherited a 18 month old baby with loads of these books!!! At LAST I am ahead in one area! Thank you SO much Sharon for the tutorial! PS... I love the newest angel and her gossamer wings!
ReplyDeleteBack again! i just tried the dip and brush technique and now I have 2 pages of color wash that I would have otherwise thrown away! PLEASE do not assume that all of us are on the same level! I ( as a beginner) really appreciate your expertise and almost cried when I found a place on your log!
ReplyDeleteWhat a fun idea. I think we've got rid of all our board books but I'm sure they're easily picked up at a thrift store.
ReplyDeleteThis looks like so much fun. I'm heading to the dollar store first chance I get and give it a try. Thanks for the wonderful tutorial.
ReplyDeleteThanks for the great tutorial Sharon. Great Pics!
ReplyDeleteThis is one of the best tutorials I've seen!! By the end of the post I am thinking you had many converts out there who never, ever thought of altering board books. You made it look soooo do-able. Kudos!! ~ Rella
ReplyDelete